Home security is a top priority for many homeowners today. We want to keep our property and loved ones safe, even when we aren’t present. This is where security cameras come in handy. You can watch your home and get alerts from anywhere if something seems wrong.
One of the most versatile outdoor security cameras is the Ring Spotlight Cam. This camera has many useful features in one device. The device can capture HD video. It has two-way talk and a loud siren. It also has motion-activated LED lights.
In this article, we will provide a complete guide to installing and setting up the Ring Spotlight Cam. We will teach you how to install the battery. Then, you can attach it and connect to WiFi. Next, set up motion detection. If you encounter any issues, we’ll also help you troubleshoot. Lastly, we’ll answer some common questions. By the end, you will know how to use Spotlight Cam to protect your home all the time.
Ring Spotlight Cam Battery Installation
Installing the battery for the Ring Spotlight Cam is simple. Follow these important steps to ensure the camera works correctly.
To power on and connect your Spotlight Cam to the Ring app, follow these steps to insert the battery.
Before you put the battery in the camera, make sure it is fully charged first. You’ll charge it by connecting the orange USB cable that comes in the box. The red and green indicator lights on the battery will be lit up when charging. Once it’s completely charged, only the green indicator will remain on. This takes 2-3 hours typically.
Once the battery is completely charged, you can put it in the back of the Spotlight Cam. Simply press the white button to pop open the door covering the compartment.

Then, slide the battery straight in until it clicks into place securely. Close the battery door, pressing firmly until it also clicks to ensure a tight seal.
Now the wiring work is complete! But there are still some remaining steps related to positioning and physically mounting your Spotlight Cam outside in the appropriate location in order for everything to operate effectively…
Ring Spotlight Cam Installation
Properly installing your Ring Spotlight Cam involves picking the right mounting method, adjusting the angle perfectly, and testing for full functionality before finalizing. It’s very similar to how you install the Ring Floodlight Camera.
Mount Ring Spotlight Camera On Wall
If you want to install your Ring Spotlight Cam on an outside wall, follow these steps for wiring and setup. To install the cam, consider the right height and location. Connect the wires safely. Fasten the hardware securely. Position the cam at the best angle.
To ensure the motion sensor works well, install the camera base 9 feet high. Make sure the sensor pod is parallel to the ground surface as well. Consider lighting conditions and field of view when picking the precise positioning.
After selecting the location, use the harness kit to connect the cam to your electrical box. Make sure to turn off the power at the circuit breaker. Use the provided wire nuts to connect the black, white, and optionally red wires. Hang the weatherproof box cover temporarily as you get the wiring sorted out.
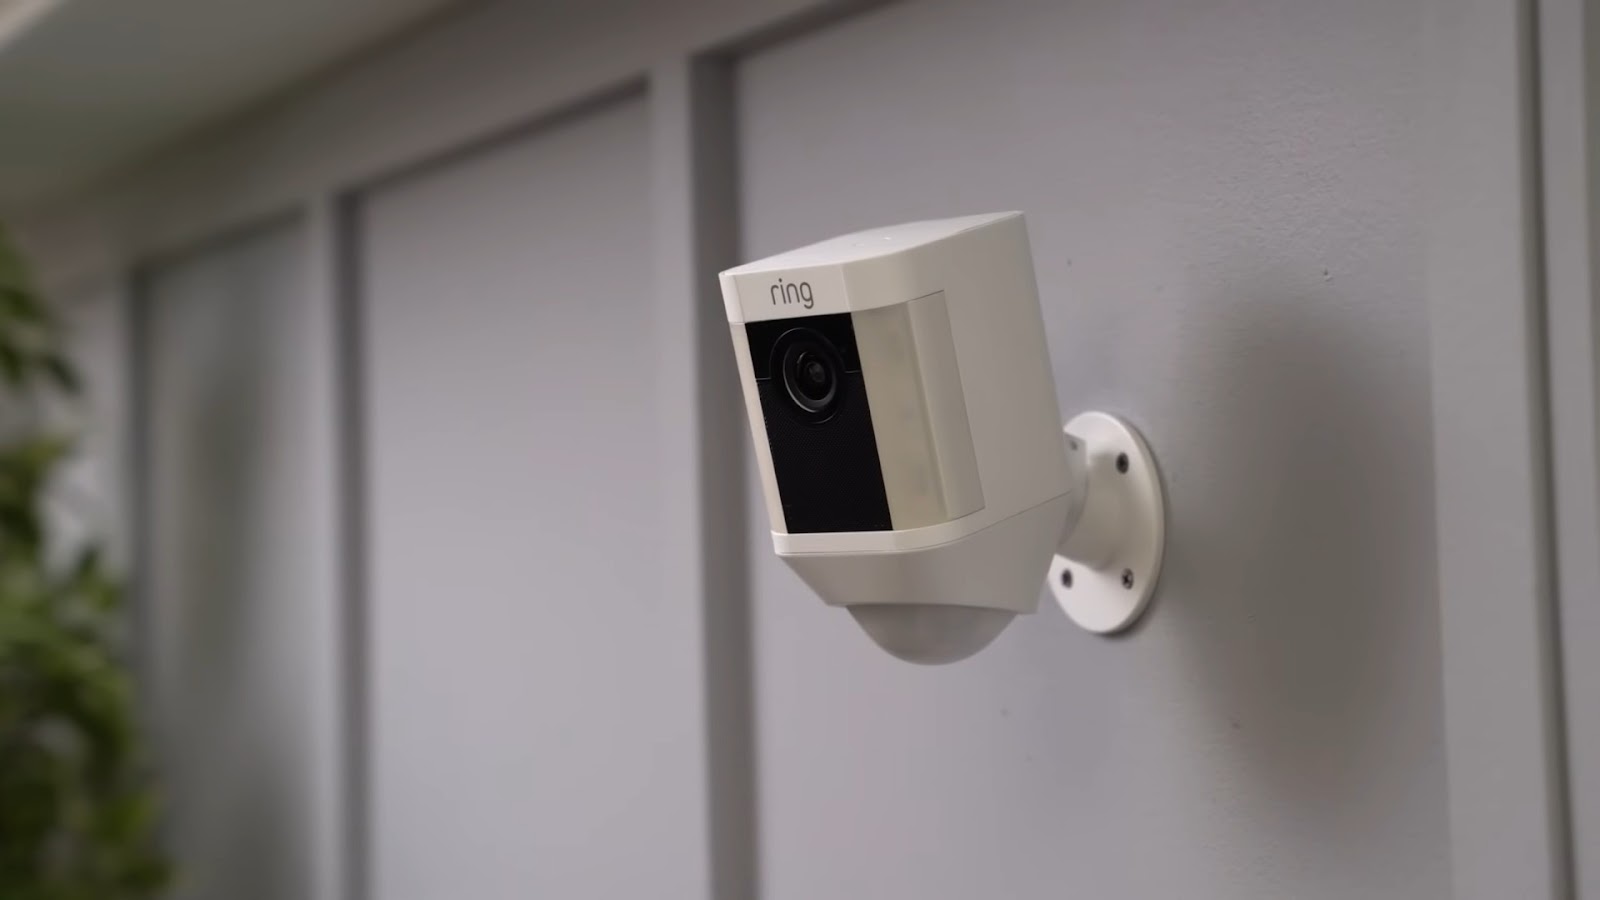
Before you permanently attach the cam, turn on the power and look for the camera’s indicator lights to check the wiring. If necessary, screw in the box cover securely. Then, lock the cam unit into the ball joint mount. Next, point the lens appropriately and tighten the retaining bolt.
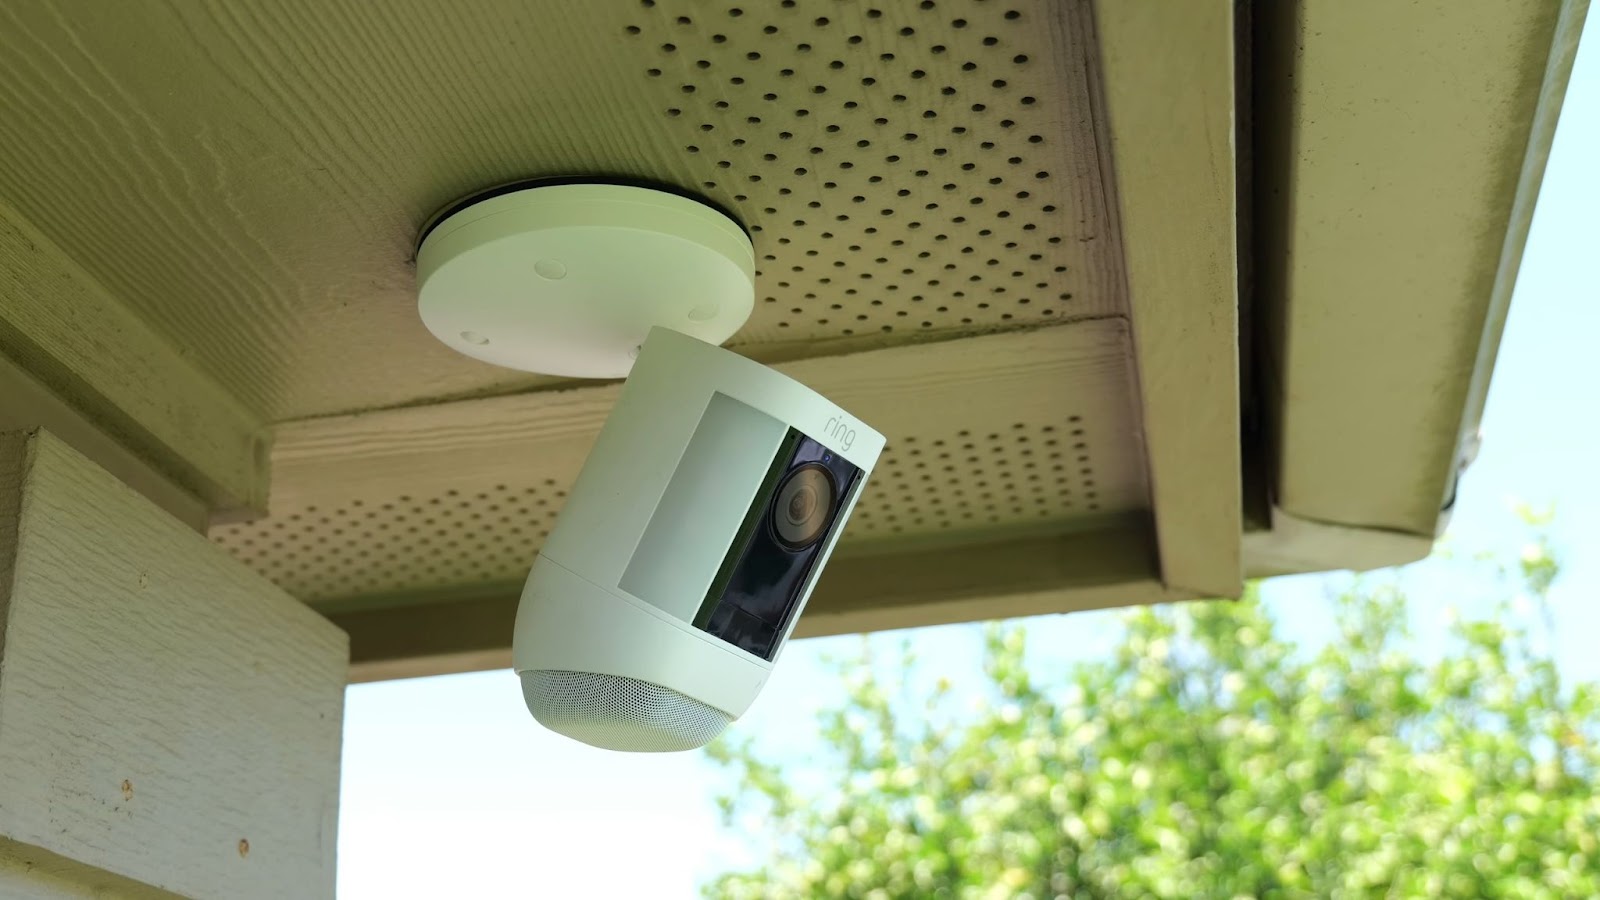
Mount Ring Spotlight Camera On Eave
To install your Ring Spotlight Cam under an eave instead of a flat vertical wall, you’ll need to make clever adjustments. This is to ensure that the cam is pointed at the best angle for clear video capture. Eaves usually slope upward with the roofline.
To increase how far the joint tilts up, make a deeper channel in the ball joint. The stock hardware doesn’t allow for much movement. You can use a tool to file down a notch on the back of the cam unit. This will make the pole attachment socket swivel upward at a higher angle.
Modifying your device voids the warranty because it disables a built-in restriction. Just make sure to test the cam before and after grinding the notch. It should work fine, even if not in the recommended position.
Just be conscious of aiming the lens at an angle parallel to the ground so you can capture subjects clearly. Before attaching the light housing to the mounting arm, flip it over and make sure the shielding faces upward. Your Spotlight Cam will work perfectly if you mount it under an overhang.
How To Install Solar Panel To Ring Spotlight Cam
By installing a solar panel, you can charge your Ring Spotlight Camera using solar power. This guide will walk you through everything you need to properly set up the solar panel for your camera.
The first step is choosing your solar panel installation location. You want to select a spot that gets direct sun exposure for at least a few hours per day. The solar panel needs direct sun to effectively charge the battery. Use the solar panel mounting arm to mark where you will drill the mounting holes.
The next step is to drill holes for the mounting screws. For brick or concrete, use the plastic anchors included. Hammer them into the holes if necessary. If installing on wood, simply use the included screws. With the holes drilled, you can mount the solar panel arm using the screws. Tighten them until snug to securely hold the arm.
Once the arm is securely installed, slide the solar panel onto it. Make sure the panel clicks securely into place on the arm so that it does not slide. Test the angle and make any adjustments to ensure optimal sun exposure.
To connect the solar panel charging cable, take out the weatherproofing plug from your Spotlight Camera. Simply slide off the mounting plate to access and remove the plug. Then slide the plate back into place with an audible click.
To connect the solar panel to the camera, remove the weatherproofing plug and use the charging cable. Ensure everything is securely plugged in for reliable charging connectivity. After connecting everything, use the bracket to mount your Spotlight Camera. Adjust the angle as necessary before tightening it in place.
Ring Spotlight Cam Setup In Ring App
After mounting your Ring Spotlight Cam, the next crucial step is establishing a connection and going through the process of configuring settings like motion detection zones, linking other devices, and testing the video feed.
Configuration & Testing
Once your Spotlight Cam is mounted outside and connected to power, you’ll need to connect it to the Ring app on your mobile device to finish the setup process. This involves creating a Ring account if you don’t already have one, adding the Spotlight Cam to your account, and configuring some initial settings.
When adding your new camera, follow the in-app prompts to connect your Spotlight Cam to your home WiFi network. Ensure you are connected to a 2.4GHz network, as 5GHz is not supported. Pick a name for your cam, and configure basic settings like motion detection zones, night vision, and privacy settings.
With the initial configuration complete, the next step is to thoroughly test the Spotlight Cam to validate everything is working as expected before relying on it for security. Here are some tips:
- Check the camera feed’s visibility by triggering motion events and ensuring notifications are received
- Verify remote spotlight control and illumination
- Enable two-way talk to check the audio quality
- Review recorded clip quality after a motion event
Take time to tweak the sensitivity and advanced detection settings to reduce false alerts while still capturing important activity. Contact Ring customer support if you encounter any setup issues. Proper testing provides confidence in your new security camera!
Setting Up Motion Detection
One of the key features of the Ring Spotlight Cam is its intelligent motion detection capability. Configuring this properly will ensure you get notified when something triggers the cam but avoid false alerts.
Within the Ring app, access the motion settings for your Spotlight Cam. Here you can tweak the sensitivity which controls how much movement is required to trigger notification. Set it high to catch more activity, lower to only capture people and vehicles.
Also adjust the motion detection range, which determines the radius distance from the cam. Use a shorter range for precise areas like walkways, longer for capturing a driveway or yard.
You can even specify custom motion zones where detection will be focused, avoiding areas like busy streets. And schedule when motion should be enabled if you only want notifications during certain times of day.
The most effective way to dial in your settings is testing. Try different sensitivity levels while moving in front of the cam to see how adjustments impact what is captured. This will ensure motion detection works flawlessly.
Ring Spotlight Camera Common Issues & Troubleshooting
Despite a generally straightforward installation process, you may run into occasional technical problems with your Ring Spotlight Cam pro and plus. Here are some of the most common issues and potential solutions to try:
Wi-Fi Connectivity Problems
If your cam is located too far from your Wi-Fi router, this can result in a spotty connection or trouble establishing an initial pairing. Consider moving the router closer or installing a wireless range extender for a stronger signal.
Mounting Location Challenges
Issues like a poor camera viewing angle, glare from a light source, or an obstructed field of view may arise from the chosen mounting spot. Take the time to experiment with different placement spots around your home exterior to optimize visibility.
Power and Battery Problems
It’s critical that your Spotlight Cam receives consistent electrical power to operate and charge properly. Check for loose wiring connections, use the solar panel accessory, or swap in fresh batteries as needed.
App Configuration Difficulties
If the Ring app is frequently losing connection with your Spotlight Cam or having setup issues, restart your mobile device and reinstall the latest app version. Reset your home Wi-Fi network as well.
Unresponsive Customer Support
In rare cases of persistent technical problems, Ring’s customer service team may be slow to respond with a resolution. Be patient but firm in requesting a callback if needed. Document the issues diligently for improved troubleshooting.
Check out the full comparison between Ring Spotlight Cam Pro vs Ring Floodlight Pro.
Wrapping Up
Installing and setting up a new outdoor security camera may seem intimidating, but the Ring Spotlight Cam makes the process very straightforward for homeowners. By understanding the key steps like charging batteries, mounting the hardware securely, establishing connectivity, configuring motion detection settings, and testing the cam functionally before finalizing the installation, you can have your camera operational in no time.
And with a few tweaks to optimize motion alerts and visibility, you can customize a reliable smart security solution tailored to your needs. We hope this guide gave you the knowledge needed to get your Ring Spotlight Cam up and running smoothly!
Frequently Asked Questions (FAQ)
Can The Ring Spotlight Cam Be Hardwired?
Ans: Yes, connecting the Ring Spotlight Cam directly to your home’s electrical wiring via junction box is supported. This enables continuous power instead of battery.
Does Ring Spotlight Cam Require Subscription?
Ans: No subscription is needed for basic features, but an optional paid plan like Ring Protect offers enhanced functionality like extended cloud storage.
Does Ring Spotlight Cam Work With Google Home?
Ans: The Ring Spotlight Cam is fully compatible with Google Home, allowing for complete voice control using Google Assistant commands. Integration is handled through the apps.
Can I Use Ring Spotlight Cam Indoors?
Ans: While possible to install indoors, the Spotlight Cam hardware and software is really intended and optimized specifically for outdoor use, so indoor usage is not recommended.
Emon is a tech enthusiast who loves to explore and write about the latest gadgets and innovations. Now he uses his passion and knowledge to cover topics like artificial intelligence, gaming, wearables, and the potential of computers.