Did you know your computer’s memory holds the key to unlock its true potential, and XMP which stands for eXtreme Memory Profile is the ultimate getaway to harnessing the power? If you own an Asus motherboard, you are lucky! Enabling XMP is the secret way that can make your RAM more powerful and can elevate the performance of your computer to new heights. In this article, we will walk you through the simple yet impactful steps to enable XMP on your Asus motherboard, unleashing a world of speed and efficiency that will leave you with a question of why you didn’t do it earlier. So are you ready to ignite your computer system with blazing-fast RAM and embark on the unforgettable computing journey? Let’s dive in.
What is XMP?
The full form of XMP is the eXtreme Memory Profile. It is an industry-standard technology developed by Intel. It helps your computer’s memory (RAM) to run at higher speeds and with optimized timings than the default settings. What XMP does is enable your RAM modules to operate at their full potential, giving an improved and responsive performance.
You can get faster data access, quicker program load times, and smoother multitasking by enabling XMP because it makes your RAM faster. XMP can simply do this by configuring the optimal frequency, voltage, and timings for your RAM modules so that you don’t have to go for manual adjustments in the BIOS (Basic Input/Output System).
XMP can be beneficial for high memory bandwidth tasks like gaming, video editing, 3D rendering, and other demanding applications. It helps your system to utilize the benefits of high-performance RAM modules delivering a good boost in the performance of the whole system.
It is also important to note that not all systems and RAM kits will work with XMP, so before you set XMP on your Asus Motherboard, it is recommended to check the specification of your motherboard and RAM so that you will know they are compatible with enabling XMP.
How To Enable XMP On Asus Motherboard?
As we know how enabling XMP on your Asus motherboard can expand the potential of your RAM, it also increases the overall performance with more speed and stability. Here are some comprehensive steps to follow in order to enable XMP on your Asus Motherboard:
Step 1: Preparing for XMP Configuration
The first step is to prepare your computer and note down all the necessary information about your RAM modules so that you can ensure that you have all the required details handy for further steps to enable XMP on your Asus motherboard. This not only will help you prepare your correct XMP profile but also optimize your RAM’s performance effectively. The following steps are:
- Make sure that your computer is turned off.
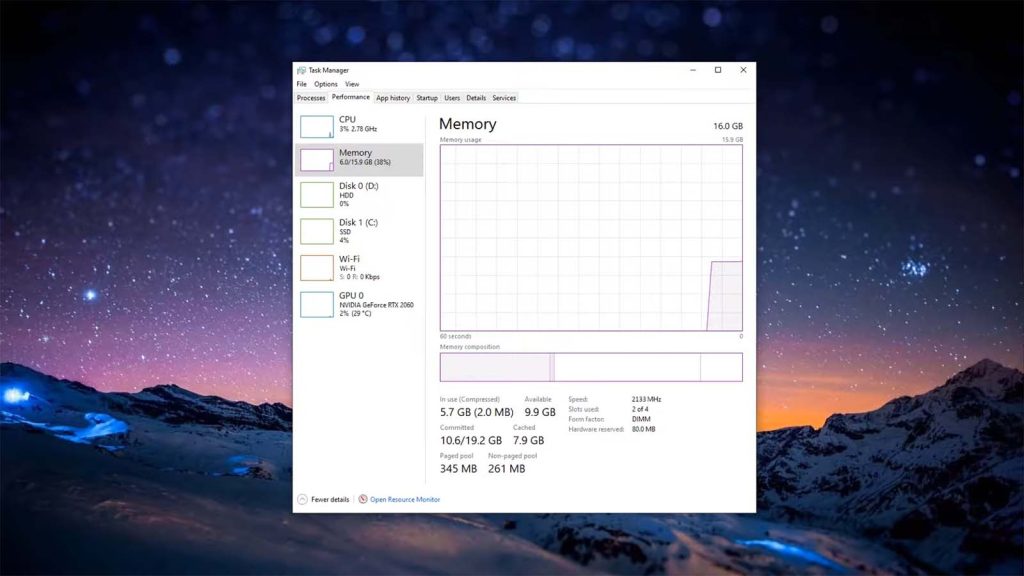
- You will have to locate the RAM modules by opening the computer. Note down the brand, model, and rated specifications (speed and timings).
Step 2: Accessing the BIOS
Another important step is to access the BIOS. For that, check the BIOS version and then update it on an ASUS motherboard. Restart your computer and access the BIOS by using the designated key- F2, you will have to press the F2 key until the BIOS shows up.

In case you face troubles you can go to the ASUS website, search for the motherboard models, and compare that to the current BIOS version with the latest one available. If you find any new update available, you can download the following file and follow all the instructions given by ASUS to update the BIOS. You will also have to make sure the ASUS motherboard has the newest firmware so that you can enable stable and optimized performance during the whole process.
Step 3: Navigating the memory settings
You will have to use your keyboard’s arrow keys to move through the options available in the BIOS menu. Look for a section on overclocking, memory configuration, or memory settings. You will find different names in that section depending on the model of your ASUS motherboard. You can change the memory settings in this section, including whether XMP is enabled. XMP is referred to as DOCP on the ASUS BIOS menu.
Step 4: Enabling XMP
Once you are done lactating the memory setting sections in the BIOS, search for an option named “XMP”, “Memory Profile,” or something similar like that. The options authorize the XMP functionality on your ASUS motherboard. Now, select the XMP option by highlighting it and pressing enter or following the instruction you get on-screen to enable XMP.
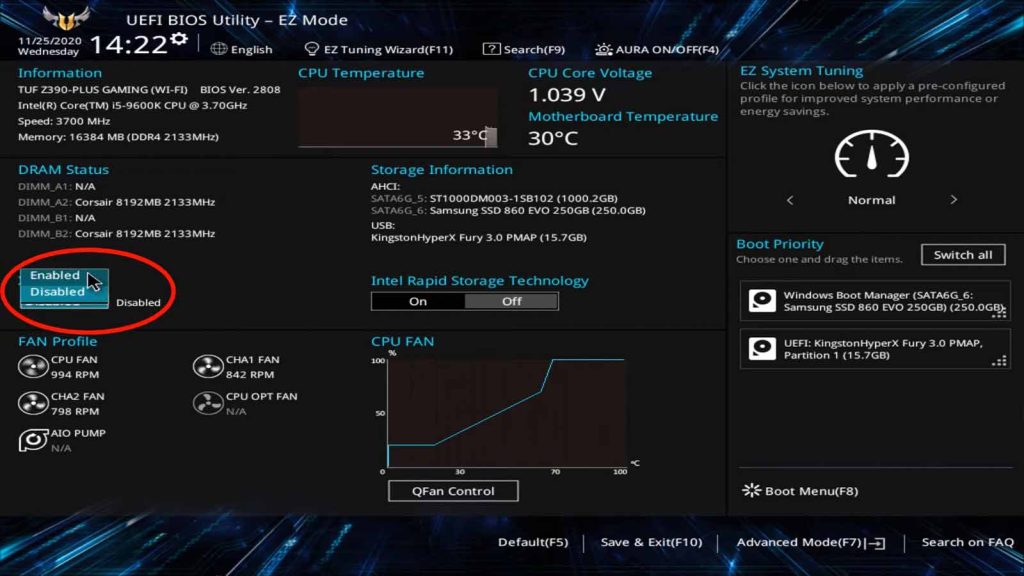
Enabling XMP will show you a pop-up confirmation. Click “Yes” on the pop-up.
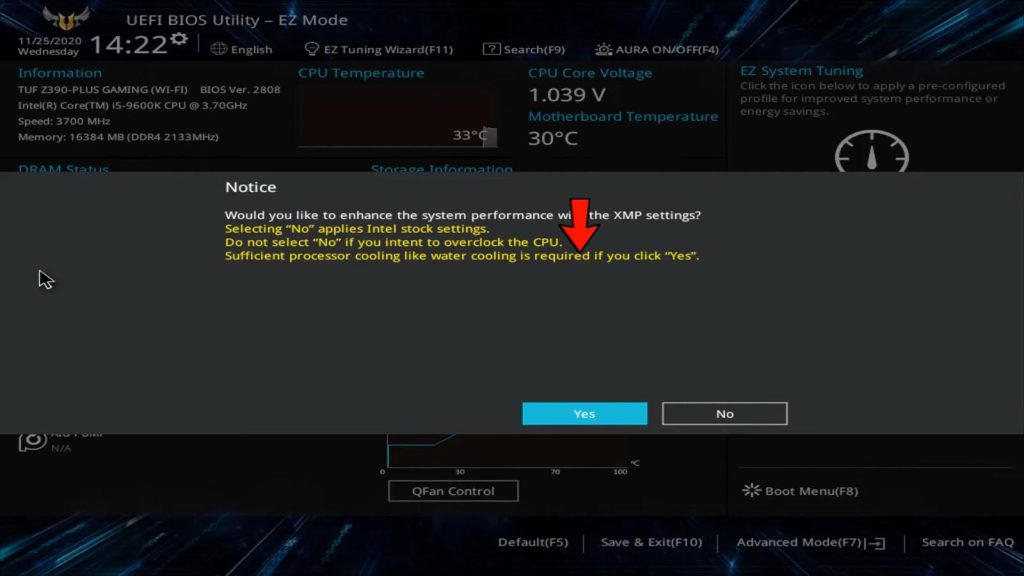
Then look down at your screen and you will see the save and exit options. Selecting this option will show you another pop up which is basically a final confirmation. Don’t worry and hit OK.

Enabling XMP unlocks the optimized settings stored in your RAM modules. It also allows them to run at their rated speed and timings. By enabling XMP, you can take full advantage of the performance capabilities of your RAM. This step is essential for ensuring optimal system performance and maximizing the benefits of XMP technology.
Step 5: Selecting the XMP Profile
While enabling XMP in the BIOS, sometimes you might get a list of available XMP profiles. Whether you get it or not depends on the motherboard model or series you have. In the ROG / TUFF series motherboard of ASUS, you will need to move on to the AI Tweaker tab on the BIOS. There you will see Ai Overclock Tuner, which will allow you to choose XMP profiles. These profiles contain different configurations with specific memory speeds and timings. It is important to select the XMP profile that matches properly with the rated specifications of your RAM modules.

Also, select the XMP version with your RAM.
Step 6: Saving Changes and Exiting the BIOS
You must save the changes made in the BIOS and leave the BIOS panel after choosing the desired XMP profile to apply the new settings. In the BIOS interface, look for the “Exit” option on the navigation bar. To save the changes, choose this option and adhere to the prompts on the screen
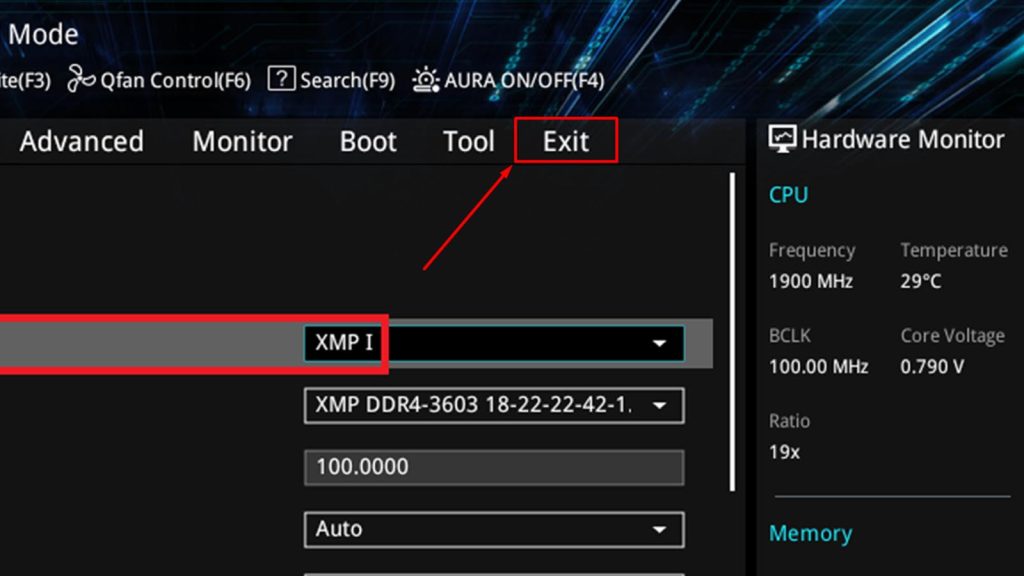
When you exit the BIOS, your computer will restart and the updated settings will be applied. It is critical to save the modifications to guarantee that the improved XMP configuration is applied consistently every time your system boots.
Step 7: Testing and Verifying XMP Configuration
After enabling XMP and saving the changes in the BIOS, it is important to test and verify the XMP configuration to ensure its stability and effectiveness. Here’s what you can do:
- Power on your computer and allow it to fully boot up.
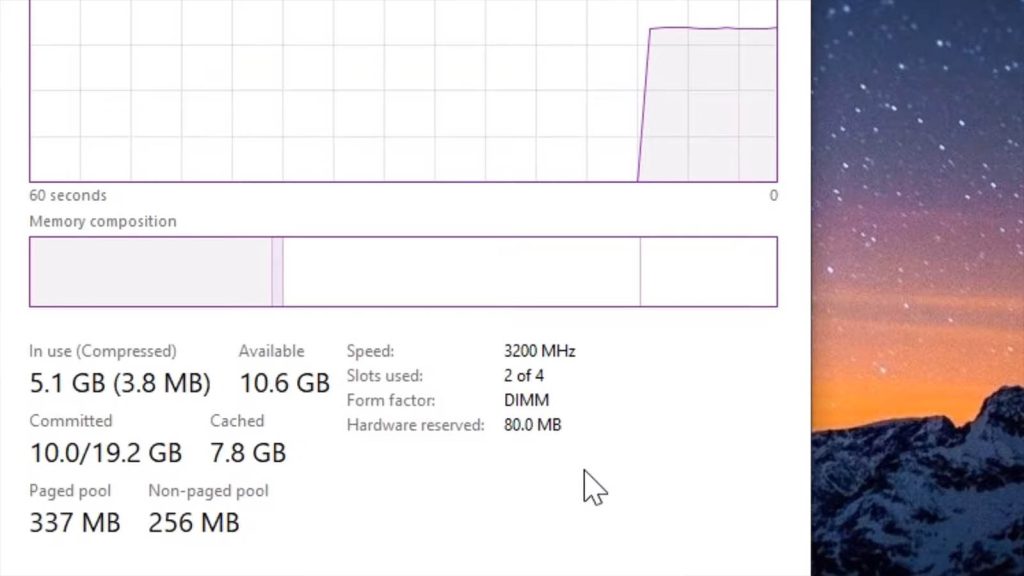
- Use a system monitoring tool or check the specifications within the operating system to verify that your RAM is running at the desired speed and timings.
- To assess stability, run stress tests or use resource-intensive applications to ensure that your system performs reliably without crashes or errors.
Should I enable XMP on the ASUS Motherboard?
You may run the XMP on your computer all well but suddenly you may see this “Your PC ran into a problem and needs to restart”. Wonder why? Considering the process may bring a significant change in the entire system of the motherboard, it is important to be mindful of all the possible drawbacks that may come with enabling XMP on ASUS Motherboard. We have to keep in mind that XMP profiles consist of pre-configured settings given by memory manufacturers. Sometimes this configuration may not be compatible with your specific ASUS model motherboard or CPU combination. In this sort of case, it may result in sudden crashes, failure to boot, or instability.
XMP profiles require a certain speed and it adjusts the memory voltage and timings to achieve that. But these systems may not be compatible with all systems. Also enabling XMP effectively overclocks the memory modules to run faster than the standard specification. Overclocking puts the memory controller and other system components under stress. Stability concerns can arise if the system is not appropriately cooled or if the components are unable to handle the increased demand.
To troubleshoot issues with enabling XMP, try the following steps:
- Check that the BIOS on your motherboard is up to date. Check the manufacturer’s website for any available BIOS upgrades and update it according to the instructions.
- To obtain a stable setup, instead of utilizing the XMP profile, try manually modifying the memory speed, timings, and voltage. This procedure may need some trial and error to determine the best settings for your system.
- Whether you have many memory modules installed, try trying each one individually to see whether one of them is causing the problem.
- If the troubleshooting process does not fix the issue, it may be necessary to seek the help of a computer specialist or contact Asus support for more assistance.
Wrapping Up
Enabling XMP on an ASUS motherboard is a simple process that helps you to enjoy the full potential of your RAM modules. By following the step-by-step instructions described in this article, you can understand how to optimize your RAM’s performance, enhancing speed and stability for improved system responsiveness. Checking the BIOS version, navigating to the memory settings, enabling XMP, selecting the appropriate XMP profile, and saving the changes ensure that your RAM operates at its rated specifications. Remember to test and verify the XMP configuration for stability and performance. Enabling XMP is a valuable technique to harness the power of your RAM and optimize your overall computing experience.


