Computer components are prone to generate excessive heat during operations and such heat can decrease the performance of your computer. To reduce heat, case fans come in aid which is considered an integral part of any PC build. Case fans play a vital role to keep the PC cool by extracting hot air from the case and bringing in cool air to maintain optimal performance. Now, the question is how to connect case fans to the motherboard. Generally speaking – case fans can be connected both on the power supply and motherboard. Connecting case fans to the power supply requires additional hardware, where you can connect the fan’s power cable directly to the motherboard header. Since it’s a more safe and more reliable option and offers some extra benefits – we are going to discuss the types of case fans and how to connect case fans to the motherboard. Let’s dive in!
Types Of Case Fans
PC case fans come in different sizes ranging from compact 80 mm to gigantic 200 mm airflow monsters. Each of these sizes has its personalized characteristics and specific use cases. Here are some common fan sizes:
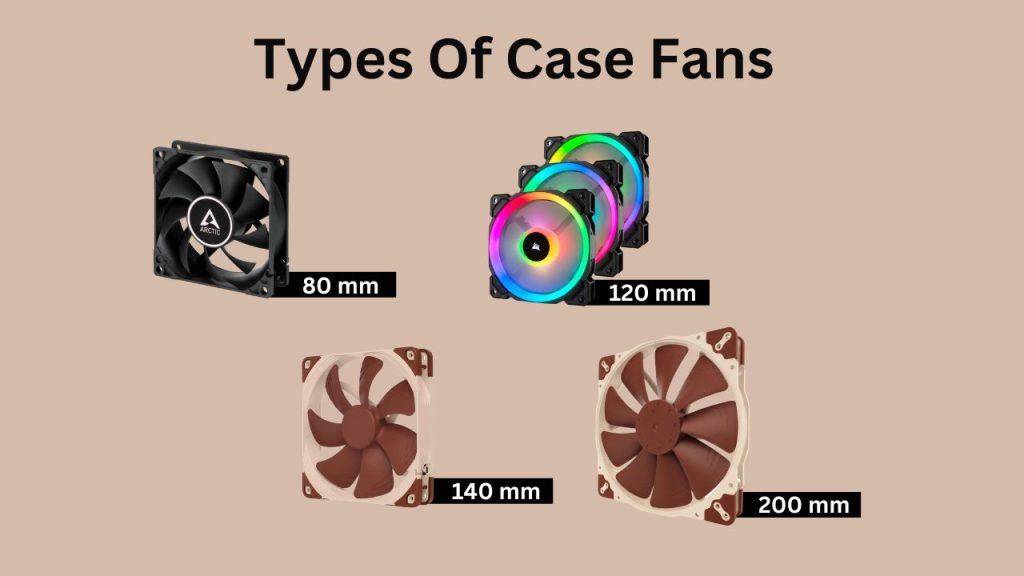
- 80mm: These compact fans are commonly found in smaller form factor cases. While they are generally smaller and produce less airflow, they can still provide adequate cooling for moderate setups.
- 120mm: This is the most popular and widely used fan size. 120mm fans strike a balance between airflow, noise level, and compatibility. They fit in most standard case fan slots and are available in a wide range of models, including those optimized for airflow or static pressure.
- 140mm: Offering larger blades and increased surface area, 140mm fans can move more air compared to their 120mm counterparts. They are particularly useful for larger cases that can accommodate them, providing enhanced cooling performance while maintaining quieter operation.
- 200mm: These fans are typically found in full-tower cases. Due to their larger size, they can move a significant amount of air at lower RPMs, resulting in quieter operation. However, they may not be compatible with all cases, so ensure that your case supports this size before purchasing.
Check out a comparison between case fans, which will help you to decide which one is best for you.
Understanding Fan Headers In Motherboard
Fan headers are the specifically designed case fan connecting points on the motherboard. These headers provide power and control signals to the fans, allowing you to adjust their speed and monitor their performance. When connecting case fans, it’s essential to identify the fan headers on your motherboard.
- Locate the fan headers: Fan headers are usually situated along the edges of the motherboard. They are labeled as “CHA_FAN” or “SYS_FAN” (short for chassis/system fan) and are often numbered for easy identification.
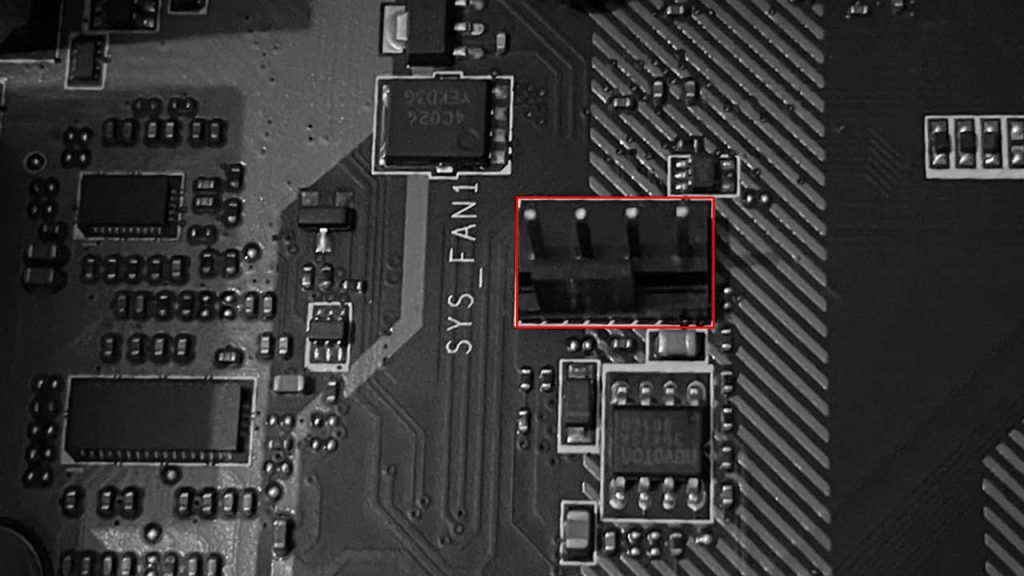
- Check the motherboard manual: If you’re unsure about the location or labeling of fan headers on your specific motherboard model, refer to the motherboard manual. The manual will provide detailed diagrams and information about the fan headers’ locations and features.
Again, when connecting case fans to the motherboard, it’s crucial to differentiate between PWM (Pulse Width Modulation) and DC (Direct Current) fan headers. These two types of headers function differently and support different types of fans.
- PWM fan headers: PWM headers are designed for PWM fans. PWM fans use a technology that adjusts the fan speed by modulating the power supplied to the fan motor. PWM fan headers typically have four pins and are labeled as “PWM” or “4-pin” headers. They allow precise control of fan speed and are commonly used for CPU coolers or other high-performance fans.
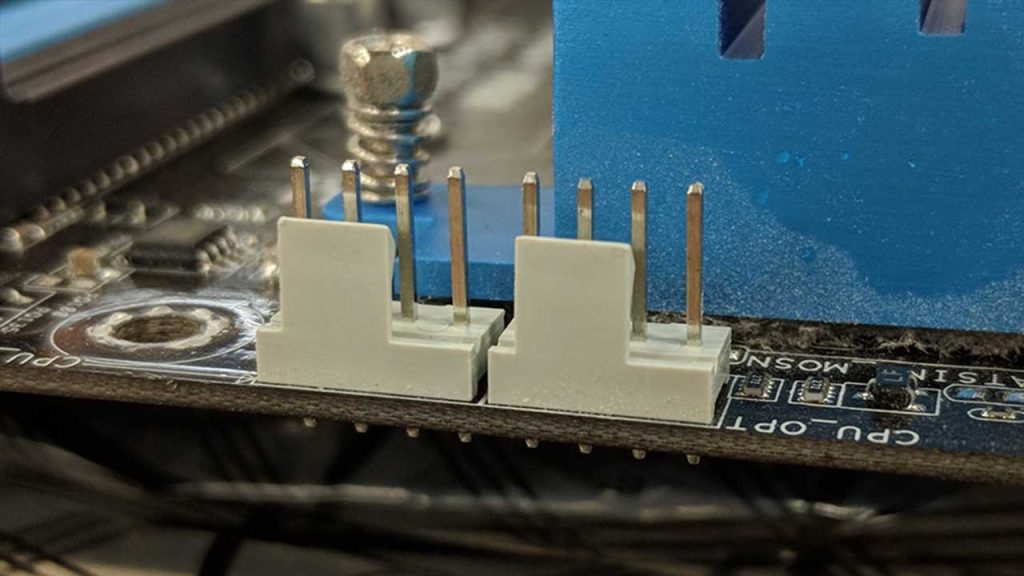
- DC fan headers: DC headers are suitable for both PWM and DC fans, but they provide control only for DC fans. DC fans have a fixed speed that is determined by the voltage supplied to them. DC fan headers usually have three pins and are labeled as “DC” or “3-pin” headers. They provide basic fan speed control by varying the voltage supplied to the fan.
When connecting fans, ensure that you match the fan type (PWM or DC) with the corresponding fan header type on the motherboard. While PWM fans can be connected to both PWM and DC headers, DC fans should be connected to DC headers only.
Understanding the differences between PWM and DC fan headers will help you choose the appropriate header for your case fans. This ensures that you can take advantage of the fan speed control capabilities provided by the motherboard and optimize the cooling performance of your system.
Required Tools To Connect Case Fans To Motherboard
When it comes to connecting case fans to a motherboard, there are a few necessary tools and accessories you’ll need to ensure a proper and efficient setup. These tools and accessories facilitate the connection and control of case fans, allowing you to regulate airflow and maintain optimal temperatures within your computer case. Here are the essentials except for case fans and motherboard:
- Fan Headers: These are the connectors on the motherboard specifically designed for connecting case fans. They provide both power and control signals to the fans. Fan headers usually have either three or four pins, with the fourth pin enabling pulse-width modulation (PWM) control.
- Fan Splitters: If you have more fans than available fan headers on your motherboard, fan splitters come in handy. These cables allow you to connect multiple fans to a single fan header, effectively splitting the power and control signals.
- Fan Controller: While many modern motherboards offer fan control options in the BIOS or through software, some enthusiasts prefer dedicated fan controllers. These devices provide manual control over fan speed and can be mounted in a drive bay or connected to an internal USB header.
- Fan Hub: A fan hub is similar to a fan splitter but provides more connectivity options. It allows you to connect multiple fans to a single hub, which is then connected to a single fan header on the motherboard. Fan hubs often offer additional features like PWM control and RGB lighting synchronization.
- Molex-to-Fan Adapters: In some cases, if you have older fans that use a Molex connector (a larger 4-pin connector), you might need adapters to connect them to your motherboard/power supply. These adapters convert the Molex connection to a fan header connection.
- Cable Ties or Velcro Strips: To manage the cables from your case fans and ensure a clean and organized setup, cable ties or Velcro strips can be used. These tools help secure and bundle cables together, minimizing clutter and improving airflow.
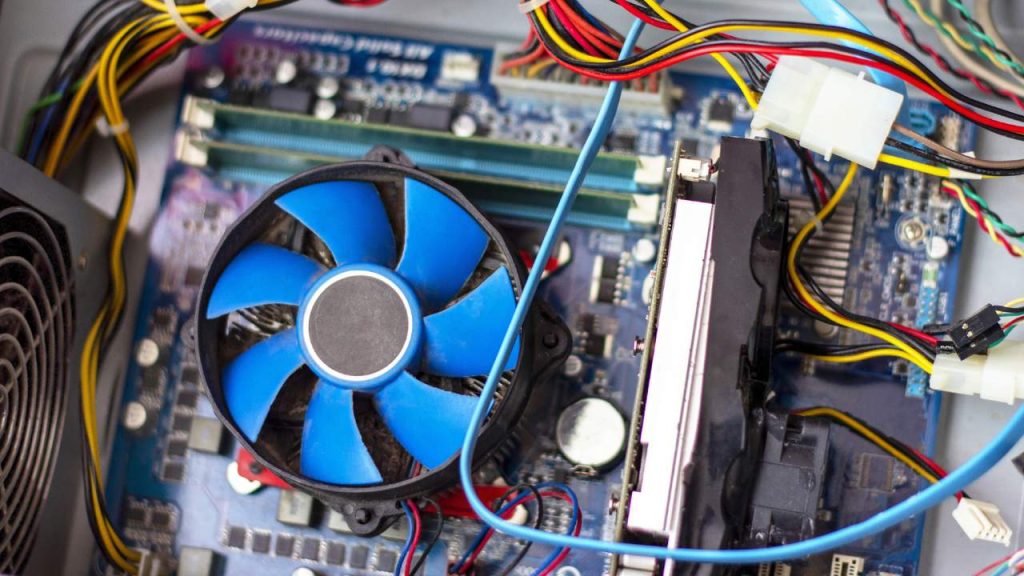
Remember to check the documentation or online resources provided by the manufacturers to ensure you connect everything correctly and avoid any potential damage to your hardware.
Installing Case Fans To The Motherboard
Installing fans onto the motherboard when building a PC is essential for fan speed control, making it a straightforward decision. By doing so, you gain the flexibility of installing multiple case fans and running them at lower speeds, resulting in reduced noise generation. We offer a helpful guide to assist you in determining the optimal number of case fans required. Additionally, we provide a step-by-step tutorial on installing case fans on your motherboard.
Fans Facing the Right Way
Ensure that the fans are oriented correctly before connecting them to the motherboard. Typically, the airflow goes from the front to the back of the case, where the front fans act as intake and the rear fans serve as exhaust.
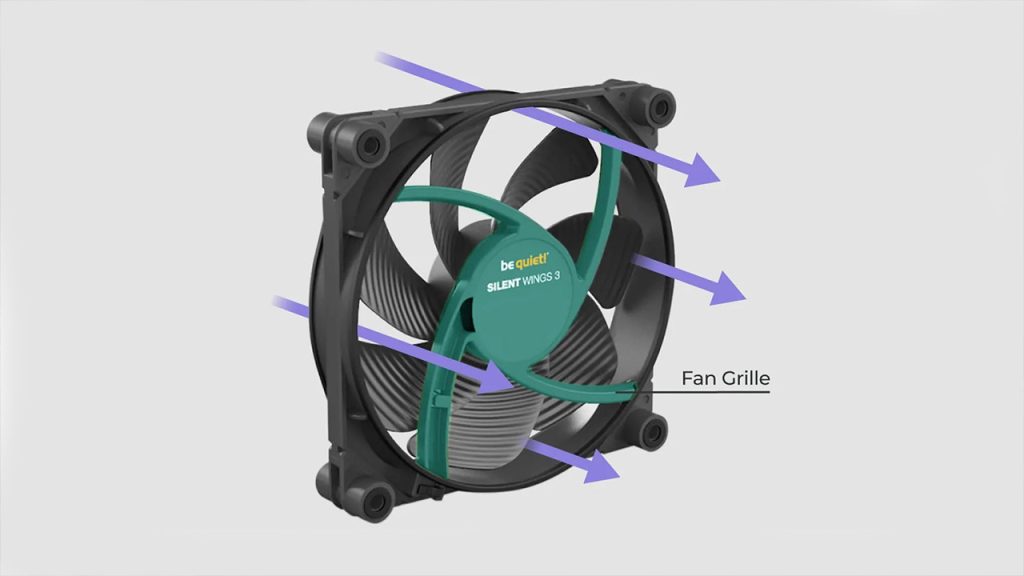
Most fans feature an arrow on the frame indicating the direction of airflow. For intake fans, align the arrow towards the inside of the case, while for exhaust fans, direct it outward.
If a fan lacks an arrow, it is highly likely that the air will blow in the direction of the sticker displaying the brand name and additional information. In such cases, position the sticker on the inside of the case for intake fans and on the outside for exhaust fans.
Connecting The Fans To Motherboard
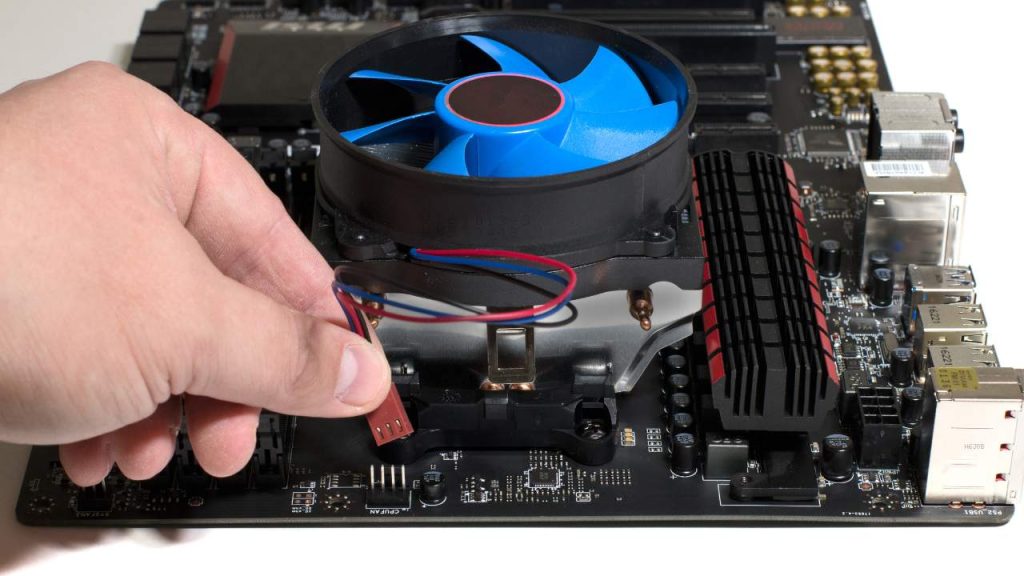
You can connect your fans to specific slots on your motherboard called fan headers. These headers are labeled as SYS_FAN (System Fan) and CHA_FAN (Chassis Fan). If you’re having trouble finding these headers, you can refer to your motherboard’s manual for guidance.
In general, it’s best to plug your fan into the closest available header. A fan header typically has four areas where you can insert the pins of your fans. Keep in mind that the fourth pin is used for extra data to monitor and control the fan speed.
If your fan has only three pins, don’t worry! You can still connect it to a four-pin header. Just make sure to plug the fan into the correct pins. To determine which pins to use, consult your motherboard’s manual.
Additional Fans & Connection
To connect additional case fans to your motherboard using a hub, you’ll need a few steps. First, locate an available fan header on your motherboard. These headers are usually labeled as SYS_FAN (System Fan) or CHA_FAN (Chassis Fan). Next, connect the hub to the fan header using the provided cable. The hub serves as an extension that allows you to connect multiple fans to a single header.
Once the hub is connected to the fan header, you can attach the case fans to the hub itself. The hub typically has multiple ports where you can plug in the fans. Ensure that you align the pins correctly and securely connect each fan to the hub.
After all the case fans are connected to the hub, you may need to provide power to the hub itself. Some hubs require a separate power source, while others draw power directly from the fan header. Consult the hub’s manual to determine if you need to connect any additional power cables.
Once everything is connected, you can turn on your computer and check if the fans are working properly. If the fans aren’t spinning or seem to be functioning incorrectly, double-check the connections and ensure that the hub is receiving power if necessary.
Connect Case Fan To Motherboard Using Header Splitter
The easiest and most affordable way to connect more fans to your motherboard is by using a fan header splitter. This device allows you to connect multiple fans to a single fan header. However, it’s important to consider the amperage (power) of both the fans and the motherboard header.
Typically, a motherboard fan header can handle up to 1 Ampere. To ensure safety and avoid performance issues, it’s recommended not to exceed this limit when adding up the power ratings of all your fans connected to a single header.

For example, if you have two fans rated at 0.4A each and you connect them using a 2-way splitter, you shouldn’t encounter any problems. However, if you have three fans with the same power rating and connect them directly to a single fan header, it’s not ideal and can pose a safety risk.
Setup Process For Fan Header Splitter
Connecting additional case fans to your motherboard using a splitter is easy. Here’s how it works: The female end of the splitter goes into the fan header on the motherboard. The male ends of the splitter are where you connect your case fans.
The price of the splitter depends on how many split ends it has, like 2-way, 3-way, 4-way, and so on. Generally, splitters are very inexpensive.
The great thing about splitters is that they can connect to both 4-pin PWM and 3-pin DC fans. So, no matter what type of fans you have, a splitter will work for you.
Wrapping Up
By now, you should know how to connect case fans to the motherboard. It’s best to connect the case fans to your motherboard first because it lets you control how fast they spin. But don’t worry if you can’t or don’t want to do that. You can also connect the fans to your power supply unit (PSU) if you’re okay with them always running at full speed.


