Without a doubt, Zoom is a powerful video conferencing app that can do more than just simple face-to-face meetings. So, whether you have just signed up or have been using it for years, there are some hidden tips that you can follow to make your next video conferencing a little less stressful. So, here are our seven useful tips to use Zoom like a pro and get better at online meetings and conferencing.
1. Enhance Your Look On Zoom Meeting
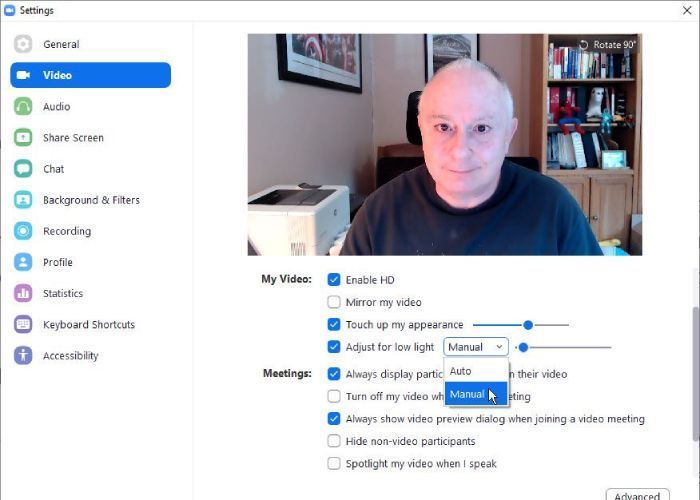
When you are in an office Zoom meeting, you need to make sure that you look as professional as possible. Our first trip will help you achieve that. So, go to the Video Settings, and under the camera, check on the HD feature to enhance your video quality. Then under My video, you will see a menu called Touch up my appearance. With this option enabled, you can smoothen out your look to hide any imperfections from your face. Beneath this, you will find another option that you can use to adjust your face in low light. You can adjust the level manually or set it to Auto. We found out that the Auto feature worked perfectly well.
2. Change Background and Filters
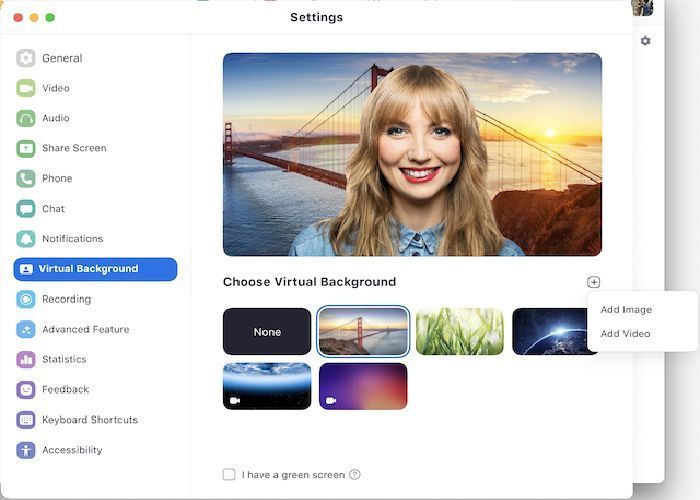
Our next tip for you is to add Virtual Backgrounds and different Video Filters to your Zoom video. To do that, again, go to the settings menu and click on Background & Filters. You will see all kinds of default Zoom virtual backgrounds, which you can apply to change your video background. But if you want to add a custom background from your computer, you can do that too. Moreover, if you have a green screen set up in your background, we suggest you enable this option from here since it will give you much better results in changing the video background.
Other than that, Zoom gives you many options to add different video filters. You can even adjust your Eyebrows, Mustache, Beard, and Lip Color from Studio Effects to liven up your online meeting. Another cool feature they recently added is the ability to pick different Avatar to your video, which works really well.
3. Improve Microphone Sound Quality
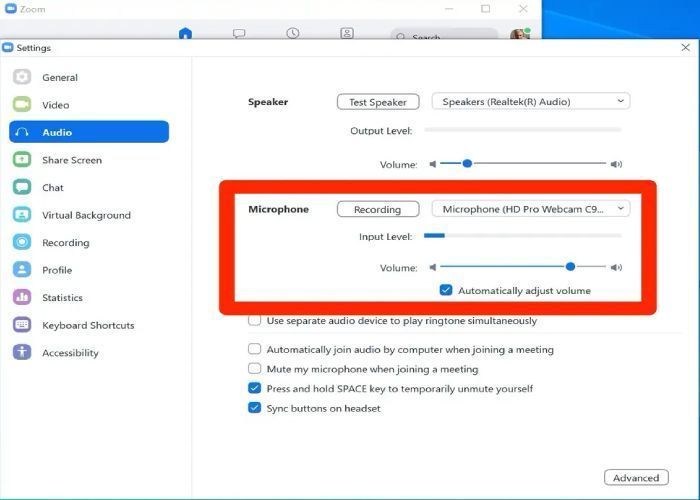
By default, Zoom heavily compresses your microphone’s audio, and if you want a higher fidelity sound, you can turn on the original sound. To enable this, go to the Audio Settings, and under Music and Professional Audio, check on the Show in-meeting option to enable “Original Sound”. You can also allow options like High fidelity music, Echo Cancellation, and Stereo audio when the original sound is on. Now, if you go back to the main screen, you will see a button to enable or disable Original Sound. Keep in mind that turning Original Sound will require more bandwidth and CPU usage, so use it when it’s really necessary.
4. Keyboard Shortcuts
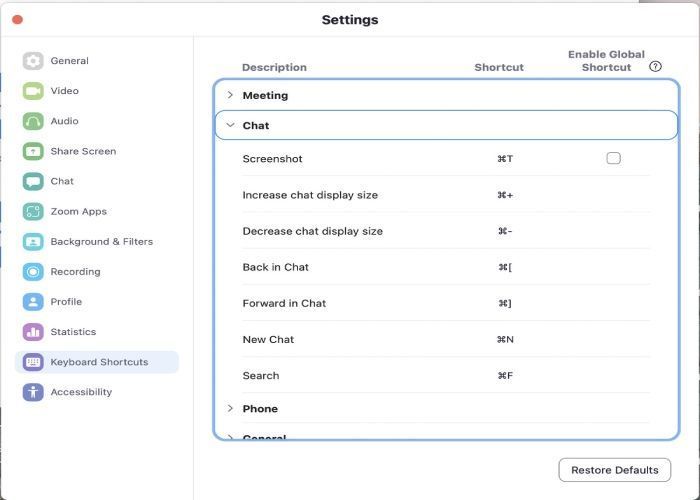
When you are in a large meeting, and someone asks you a question, usually, you go here to unmute yourself, give your response, and again click here to mute yourself. This is quite painful. Instead, you can just press your Spacebar to mute and unmute yourself, which is one of our favorite Zoom shortcuts. But there’s plenty more, and you can access all of these Keyboard Shortcuts from the settings menu. Not just that, you can even make changes to these shortcuts and make them a Global Shortcut, meaning all these shortcuts are effective even when you minimize Zoom.
5. Share Screen
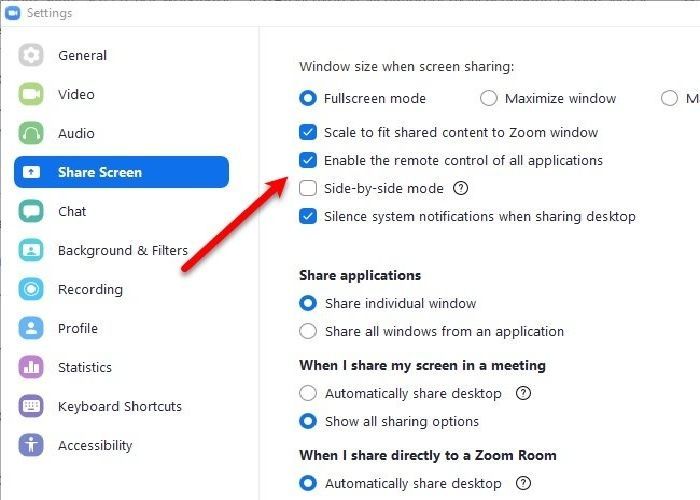
With Zoom, you are not limited to sharing yourself on the screen. You can click on the Share Screen and select the single or multiple windows that you want to share. You can also share a Whiteboard to jot down ideas with your attendees, then share your iPhone or iPad screen to show what’s on your device. In addition to that, Zoom gives you a cool AnnotationTool when you share these screens. With this tool, you can insert Text or Draw something on your screen, Stamp, Spotlight, Erase, and many more.
6. Waiting Room
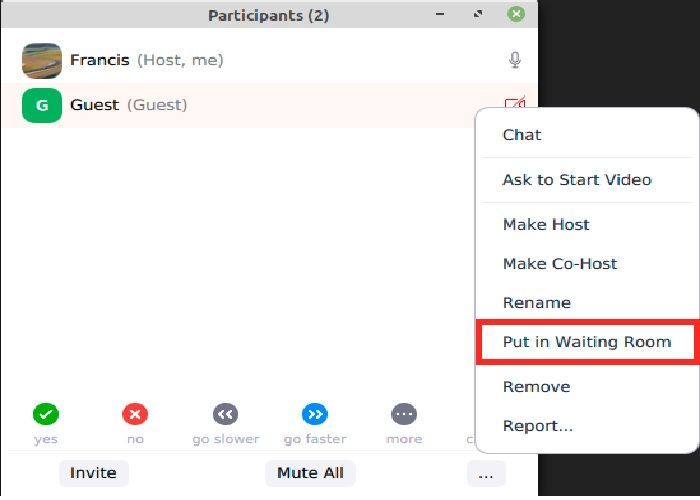
Another excellent feature we love to use with our Zoom is creating a Waiting Room where all our participants can wait before joining a meeting. This way, we can admit each attendee individually and avoid unwanted intrusion. To enable this option, go to the Profile settings, and select Edit My Profile. Then you need to login into your Zoom profile. After logging in, go to Settings from the left panel and enable the Waiting Room option from your right screen. With this feature on, your participants will see a message like this when they attempt to join your meeting. On the other hand, as a meeting host, you will see a prompt like this to Admit them into your meeting or Remove them from the waiting room.
7. Enable End-to-end Encryption
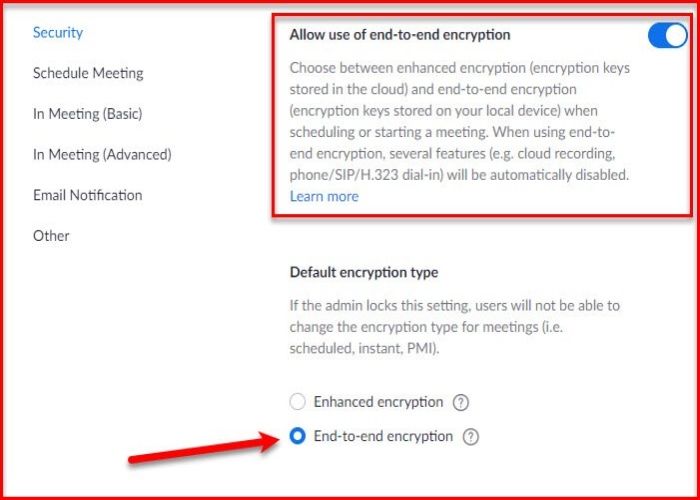
Last but not least, you can enable end-to-end encryption for your meetings. Early on, Zoom was heavily criticized for not being secure, so later, they invested heavily in various security features. To add this feature, again go to your Zoom profile settings, and at the bottom, under Security, you will have the option to enable end-to-end encryption. It will ask for your contact number, which you need to add and verify. Then under the Default encryption type, select End-to-end encryption. Once enabled, you will see a security badge in your zoom meeting. The only caveat is every one of your meeting attendees needs to turn on this feature. But it’s totally worth it when you are sharing something top secret.
Final Verdict
So that was all about our seven useful tips to use Zoom like a pro. We believe you have learned a brunch of new techniques if you have gone through the whole article. Use these techniques in your professional meetings to enhance presentability and confidentiality. If you find this article helpful, visit our blog from time to time for more content like this.
With years of software development experience, Santos Cruickshank has a passion for exploring PC software and mobile apps. A former lead developer at Slack in 2017, he now freelances while educating others about software development and usage through his writing.